Exportearthworms.com – Starting a worm farm can be both affordable and straightforward. With a dash of creativity, some recycled materials, and a bit of patience, you can turn your kitchen scraps into nutrient-rich compost while cutting down on household waste all without breaking the bank. This guide will take you through everything you need to know to set up and maintain a thriving worm farm on a budget.
You can expect practical, low-cost options, smart shortcuts, and effective techniques that work whether you’re in an apartment, a suburban backyard, or on a small farm. The information provided here emphasizes budget-friendly choices and simple routines that save both time and money while still yielding fantastic worm castings and liquid fertilizer.
So, why should you start a worm farm, especially if you’re watching your budget?
A worm farm takes organic waste and transforms it into valuable compost (known as worm castings) and liquid feed (often referred to as “worm tea”) that benefits your plants, cuts down on fertilizer costs, and helps lower trash disposal expenses. The great news for those on a tight budget is that many of the essential materials like food scraps, cardboard, shredded paper, old pallets, and plastic containers are either free or very inexpensive.
Worms are nature’s recyclers: they thrive in the same materials they break down, so your main investment will be in a suitable container, a few basic tools, and a starter colony of worms. With low maintenance and the ability to gradually expand your setup (just add another bin or container as you gather more materials), worm farming is a perfect fit for those on a shoestring budget: minimal initial costs, with ongoing benefits in soil health and waste reduction.
1. Picking the right worms and where to get them cheaply
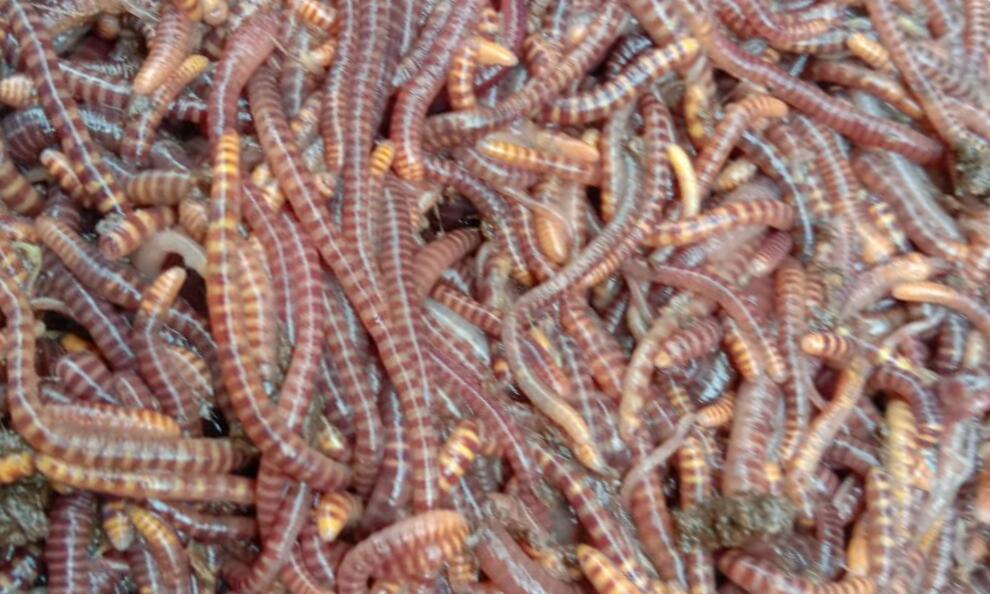
When it comes to composting, not all worms are created equal. You’ll want to look for composting worms, often called red worms or “red wigglers.” These little guys thrive in the cozy environment of your compost bin and reproduce like champs! If you’re looking to save a few bucks, consider reaching out to local gardeners, community gardens, or gardening groups. Many folks with established worm bins are more than happy to share or sell a portion of their worm colony for a small fee.
Another budget-friendly option is to browse classified ads, community boards, or local Facebook groups where backyard composters often give away worms. Just steer clear of garden earthworms; they prefer living in soil and won’t do well in a compost bin. When you get your hands on some worms, a small starter colony of just a few hundred will do the trick; they’ll multiply as they settle into their new home.
2. Low-cost bin options and DIY builds
Now, let’s talk about low-cost bin options and DIY builds. You can create a functional worm bin using something as simple as a repurposed plastic tote with holes drilled for aeration and drainage, or even stacked wooden crates. If you have some outdoor space, a homemade pallet bin works great too. The key elements are ventilation, drainage, and a nice dark environment. For those just starting out on a budget, repurposed plastic storage boxes (with lids) are perfect. You can often find them cheap or even free at thrift stores, garage sales, or through household donations.
Just remember to drill or poke small holes in the sides and lid for air, and a few holes in the bottom to let excess liquid escape. It’s a good idea to place the bin on bricks or a tray to catch any leachate. If you’re interested in a multi-tier system for easier harvesting, you can stack two identical totes, filling the top one gradually.
For outdoor setups, old wooden pallets or reclaimed lumber can be put together to create a larger static bin. Just line the inside with cardboard to help retain moisture and provide some initial bedding. Whatever container you choose, make sure to keep it out of direct sunlight and away from freezing temperatures keeping your worms comfortable is key to successful composting!
3. Bedding, the initial setup, and other free materials
Bedding is essential for creating a cozy home for your worms, where they can munch on food scraps. It needs to be absorbent, loose, and rich in carbon. Think shredded cardboard, non-glossy newspaper, dried leaves, straw, and aged compost all of which you can often find for free. Save those pizza boxes and corrugated cardboard, shred up some old newspapers, and don’t hesitate to ask your neighbors for fallen leaves; many are more than happy to let you take them off their hands.
Make sure to moisten the bedding until it feels like a wrung-out sponge, then fill your bin about two-thirds full. Place the worms on top and cover them with a layer of moist bedding or a piece of damp cardboard to keep things dark and humid. Steer clear of scented or colored paper, as well as anything with heavy inks or glossy finishes. The great thing is, you won’t need to buy anything special for this initial setup if you use what you already have at home and in your yard.
4. Feeding on a budget: what to include and what to skip
Worms are pretty easy to please and will happily munch on most kitchen scraps: think fruit and vegetable peels, coffee grounds and filters, crushed eggshells (make sure they’re dried), tea bags (just check the labels), and small amounts of cooked leftovers. To keep costs down, use your kitchen waste instead of splurging on commercial worm food. Just remember to balance “green” nitrogen-rich scraps (like fruit and veggie scraps and coffee grounds) with “brown” carbon sources (like cardboard pieces and dry leaves) to keep odors and excess moisture at bay.
Avoid giving them large amounts of citrus, oily or heavily spiced foods, meat, dairy, and bones, as these can attract pests and create unpleasant smells. If you want quicker results, chop or blend your scraps into smaller pieces to speed up decomposition. Start by feeding them modestly add small amounts at first and gradually increase as your worm population grows to prevent overfeeding and any unpleasant conditions.
5. Simple maintenance and troubleshooting
Worm farming’s maintenance routines are straightforward and inexpensive. Turn the bedding gently every few weeks to aerate, monitor moisture levels (add water if dry, squeeze out excess liquid or add dry bedding if too wet), and remove finished castings when they’re dark and crumbly. If smells develop, it usually means anaerobic conditions: add more dry browns and reduce feeding, ensure proper drainage, and turn the material.
Pests like fruit flies are controlled by burying fresh food deeper in the bedding and maintaining a dry, covered surface; rodents can be deterred with secure lids and elevated bins. Keep your bin in a stable temperature range most composting worms prefer about 15–25°C (59–77°F) — and move it to a shaded or insulated spot if outside. These low-effort steps prevent costly mistakes and keep your operation lean.
6. Harvesting castings and using outputs to save money
Harvesting can be done with minimal tools: push finished material to one side and add fresh bedding and food to the clean side; the worms will migrate, allowing you to scoop out finished castings after a few weeks. Alternatively, dump the bin onto a tarp in sunlight and gather the worms as they burrow away from the light, leaving castings near the surface. The castings can be mixed into potting mixes, applied to garden beds, or brewed into liquid fertilizers.
Using your own worm castings reduces or eliminates the need to buy commercial fertilizers and soil conditioners, translating into real savings over time. Even small household bins produce enough high-quality amendment to noticeably boost vegetable and container garden yields.
7. Scaling, community resources, and ongoing savings
Start small and reinvest the benefits. As your worm population grows and your confidence increases, scale up by adding another tote or converting a larger outdoor bin. Join local gardening or composting communities to exchange materials: someone else’s shredded paper or leaf piles can be your new bedding, and neighbors may welcome finished castings. Many cities and community gardens offer free or low-cost workshops, and online forums provide troubleshooting help at zero cost. The recurring savings lower trash bills, reduced fertilizer purchases, and healthier plants compound quickly, making worm farming one of the most cost-effective forms of home horticulture.
Final tips to keep costs down and success high
Be resourceful: reuse, repurpose, and connect with local networks for free inputs and worm-sharing. Prioritize simple, low-tech solutions that are forgiving and easy to maintain. Keep careful but simple records a small notebook or photo log of feeding schedules, moisture adjustments, and harvests will help you learn quickly without expensive experimentation. Invest only what you can afford in the beginning and allow your farm to grow naturally; in most cases, the farm will pay you back in better soil, reduced waste, and less need for store-bought amendments. With patience and minimal outlay, a shoestring-budget worm farm can become a steady, eco-friendly system that benefits your garden, your wallet, and the planet.