exportearthworms.com – Red wiggler worms (Eisenia fetida) are the go-to choice for vermicomposting around the globe. They’re a favorite among home gardeners, organic farmers, waste-management companies, and even large-scale vermiculture operations. These little guys are amazing at breaking down organic waste, turning food scraps into nutrient-packed worm castings, which are some of the best natural fertilizers you can find. With the growing interest in sustainable farming and eco-friendly waste solutions, knowing how to raise, care for, and get the most out of Eisenia fetida is becoming more crucial than ever. This comprehensive guide dives into everything you need to know about red wiggler biology, effective vermicomposting methods, feeding tips, bedding management, troubleshooting advice, and even commercial opportunities.
1. Understanding Red Wiggler Worms (Eisenia fetida)
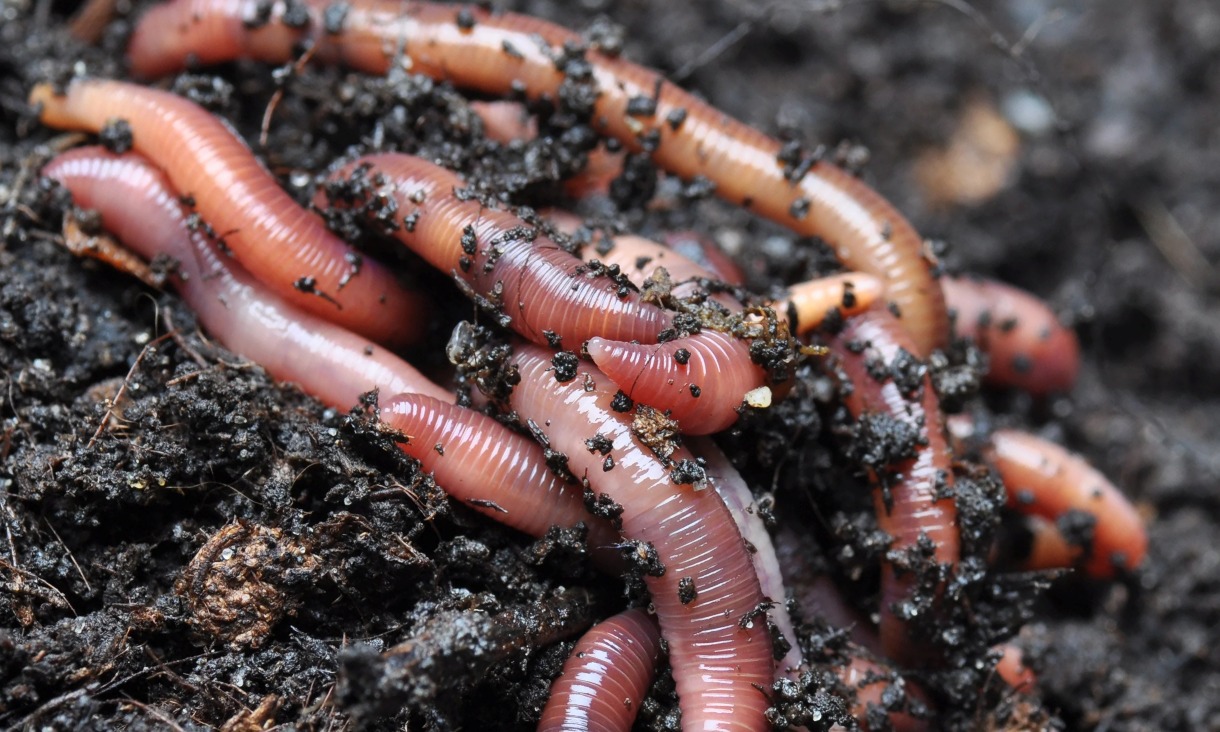
Red wiggler worms, scientifically known as Eisenia fetida, are those small, reddish-brown earthworms that thrive in decaying organic matter instead of traditional soil. This unique preference makes them perfect for composting systems, where they can munch through a surprising amount of organic waste up to half their body weight in food scraps each day! As they digest this waste, they produce worm castings, which are like gold for gardeners, packed with beneficial microbes, humic acids, nitrogen, phosphorus, potassium, and essential trace minerals that plants love.
On the biological front, Eisenia fetida is quite the survivor. They reproduce at a rapid pace, can handle moderate temperature changes, and are perfectly at home in tight spaces like worm bins. These traits have made them the go-to choice for both vermiculture businesses and home composting fans. Unlike your typical garden earthworms, red wigglers prefer to hang out in shallow bedding, enjoy high-moisture environments, and thrive in organic-rich materials, making them ideal for controlled composting setups.
2. Benefits of Vermicomposting with Red Wigglers
Vermicomposting delivers a range of environmental, agricultural, and economic benefits. It is one of the most efficient ways to recycle organic waste, reducing landfill pressure and lowering greenhouse gas emissions. Using red wigglers for composting not only helps the environment but also provides gardeners with a continuous supply of premium fertilizer.
Key Benefits of Vermicomposting
- Rapid Breakdown of Organic Waste: Red wigglers accelerate decomposition, turning food scraps into compost much faster than traditional methods.
- Production of High-Quality Castings: The resulting worm castings contain beneficial microbes that improve soil structure, aeration, and water retention.
- Odor-Free Decomposition: When managed properly, a worm bin produces little to no smell, making it ideal for indoor or small-space use.
- Low Maintenance and Cost-Effective: Red wiggler systems require minimal upkeep and have low operational costs.
- Year-Round Composting: Unlike outdoor bins that depend on temperature, worm bins can operate efficiently throughout the year.
- These advantages make Eisenia fetida the cornerstone of modern organic waste management and small-scale sustainable farming.
3. Setting Up a Red Wiggler Worm Bin
If you want to create a thriving worm bin, it’s all about giving those red wigglers the right environment to flourish. Think of their home as a mini version of their natural habitat—moist, dark, and filled with decomposing organic matter. Whether you’re going for a DIY setup or a store-bought vermicomposting bin, there are a few key elements you’ll need for long-term success.
✔ Choosing the Right Container
You can use a plastic tote, a wooden box, or even a stackable commercial worm bin—whatever suits your style! Just make sure your bin has:
- Adequate ventilation holes
- Drainage outlets to keep excess moisture at bay
- A lid to keep it dark and humid
The size of your bin should match the amount of waste you produce. A 10–20 gallon bin is usually perfect for most households.
✔ Preparing the Bedding Material
Bedding is crucial for the worms’ comfort, moisture, and structure. The best materials to use include:
- Shredded paper or cardboard
- Coconut coir
- Peat moss (use sparingly because of its acidity)
- Dried leaves
- A handful of finished compost to kickstart the microbial life
Make sure to moisten the bedding until it feels like a wrung-out sponge. This level of moisture is just right for red wigglers to breathe through their skin.
✔ Adding the Worms
For a good starter population, aim for about 1 pound of red wigglers, which is roughly 800–1,000 worms. This amount can handle about ½ pound of food waste each day when conditions are optimal. Gently place the worms on top of the bedding and let them burrow down on their own.
4. What to Feed Red Wiggler Worms
Feeding your red wiggler worms is a crucial part of successful vermicomposting. These little guys love a diverse diet of organic materials, but there are definitely some foods you should steer clear of to keep your worm bin healthy.
✔ Best Foods for Red Wigglers
- Fruit and vegetable scraps
- Coffee grounds and filters
- Tea bags (make sure they’re plastic-free)
- Crushed eggshells (they help reduce acidity)
- Plant trimmings
- Grains, rice, and bread (just a little bit)
Chopping up food scraps into smaller pieces can really help speed up decomposition and keep any unpleasant odors at bay.
✔ Foods to Avoid
It’s best to skip items that might create odors, attract pests, or bring in harmful bacteria:
- Meat, fish, and bones
- Dairy products
- Oily or greasy foods
- Large amounts of citrus
- Onions and garlic
- Spicy foods
- Anything plastic or synthetic
One common mistake is overfeeding, which can lead to bad smells and anaerobic conditions. Always bury your food scraps under the bedding and only add new food when the previous batch has mostly been eaten.
Read More: Export Red Wigglers (Eisenia fetida): Shipping, Regulations, and Profitability
5. Keeping Your Worm Bin in Tip-Top Shape
To have a thriving vermicomposting setup, you need to put in some regular care to ensure your worms are happy and doing their thing. Eisenia fetida, or red wigglers, really shine when their environment mirrors what they naturally love.
✔ Temperature Needs
- Red wigglers do best at:
- 15–25°C (59–77°F) is just right
- They can hang in there at 5–30°C (41–86°F), but their reproduction takes a hit
Steer clear of extreme temperatures.
✔ Moisture Control
Keep moisture levels between 60–80%.
If the bedding feels too dry, a little spray of water will do the trick. If it’s too soggy, toss in some dry paper or cardboard.
✔ pH Level
The sweet spot for pH is 6.5–7.5
You can add crushed eggshells to help balance out any acidity.
✔ Airflow
Gently turn the bedding every few weeks to boost airflow and avoid any stinky anaerobic spots.
6. Harvesting Worm Castings
Worm castings are the ultimate goal of vermicomposting, providing gardeners with an organic fertilizer prized for its nutrient density and microbial activity. Harvesting typically occurs every 2–4 months depending on feeding rates.
Methods for Harvesting Castings
- Side-to-side method: Add new bedding and food to one side to encourage worms to migrate.
- Light method: Pour castings onto a flat surface and shine light; worms burrow downward, allowing you to remove top layers.
- Screening method: Use a mesh screen to separate worms from finished compost.
Once harvested, castings can be used directly in gardens, potted plants, seed starting mixes, or brewed into nutrient-rich worm tea.